Know your PianoHack
The PianoHack is a small box powered by a dual-core 32-bit audio processor. It has no sounds of its own — it sits between your MIDI controllers and your sound source, remapping notes in real time.
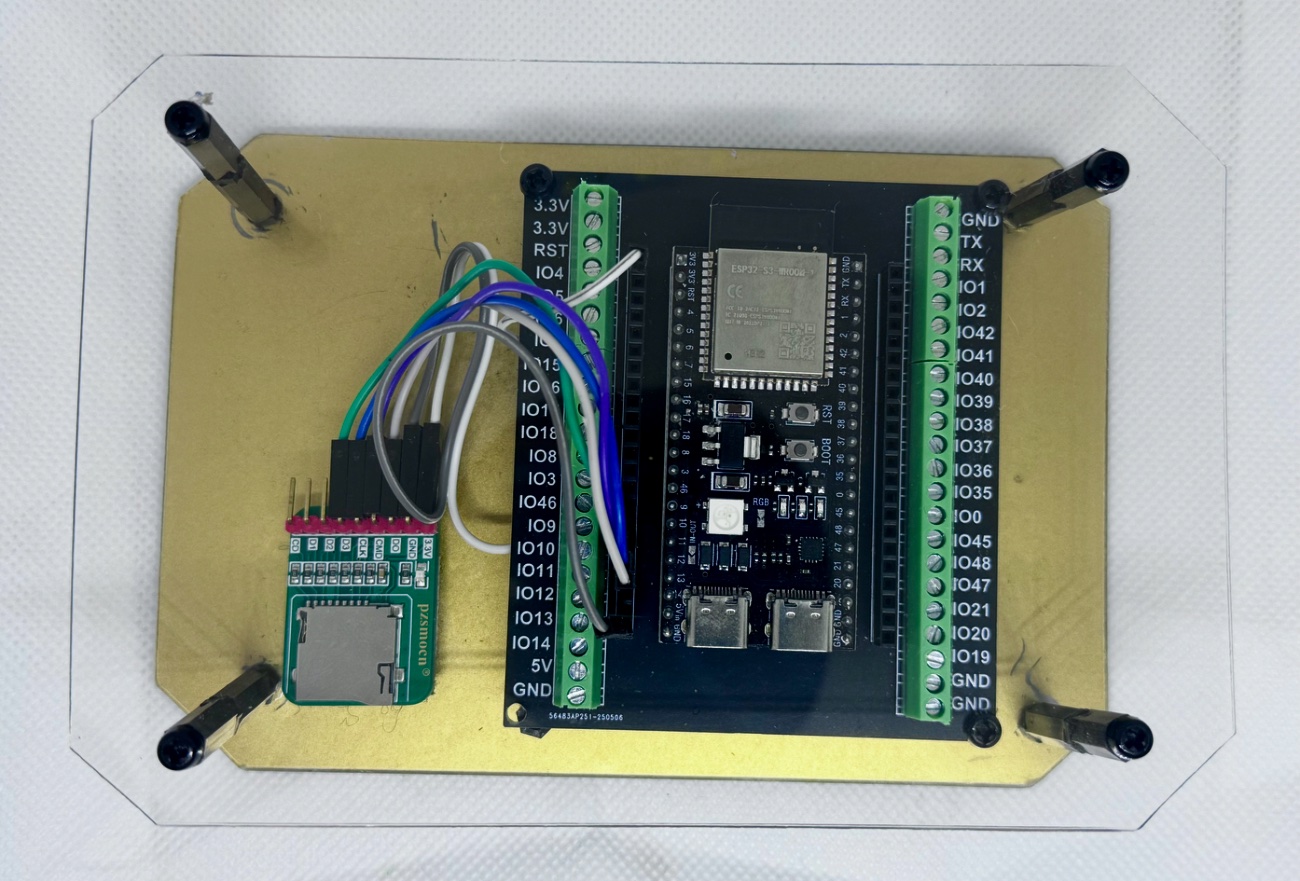
- Micro-SD card slot
Holds the PianoHack/phRiffs.txt file with your custom riffs for the 1-Button Riff feature. Load riffs at home — you don't need the card at the gig.
- MIDI IN / OUT USB-C port (right)
Connect here for normal play. The PianoHack appears as a MIDI controller when connected at this port.
- Programming / update USB-C port (left)
Used only for firmware updates from the Update page. Use a USB-C cable capable of data transfer.
Required hardware
You will need some — but maybe not all — of the following in addition to the PianoHack unit itself.
A programmable MIDI controller Required
Any controller where you can set MIDI CC, note, and channel data. Recommended: Novation Launchpad X, Launchpad Mini, or Launchpad Pro (MK3 or MK4), or Launchkey MK3 / MK4 — all programmable with Novation's free Components software. The Korg nanoPAD also works via its Kontrol editor.
Get ready-made Novation templates →A MIDI merge unit Required for 2+ controllers
Gets all your controllers' MIDI into the PianoHack. Suggested: CME H2MIDI Pro (~$49.99), CME H4MIDI WC (~$80, USB host + merge in one), or CME H12MIDI Pro. DoreMidi USB host + merge devices also work.
Get ready-made CME routing profiles →Powered USB hub & cables
A 4–8 port powered USB hub (~$10–20) connects your controllers — and the PianoHack itself — to the merge unit. Add a MIDI-to-USB cable if you're going from a 5-pin DIN out into a computer DAW.
A sound source Required
Any of: a DAW (tested with Ableton Live, GarageBand, Logic Pro), a MIDI sound module with a MIDI IN port, or a sound app — Numa Piano by Studiologic (free, iPad/iPhone/Mac/Windows/Linux), MainStage (~$30, Mac), or Sunday Keys.
Optional: MIDI mixer
Control the volume of each channel the PianoHack outputs on. Korg nanoKONTROL2 and Novation Launch Control XL work great — or just use the sliders and knobs on your programmable keyboard controller.
Optional: battery power & SD reader
Go portable with a pedal power bank (AROMA 9V 10000mAh, On-Stage PS1000, or Marbero). Add a micro-SD card reader for your computer if you want to load your own riffs for the 1-Button Riff feature.
Basic hardware flow
MIDI controllers (the PianoHack is one of them) → powered USB hub → MIDI merge unit → your DAW, sound module, or sound app.
Your MIDI controllers
Launchpad, Launchkey, keyboard keybed — chord buttons and note keys.
PianoHack + hub + merge
All controllers and the PianoHack connect to a powered USB hub into the CME H2/H4 merge. Wrong notes become right notes.
Your sounds
Out via USB-C or 5-pin MIDI DIN to a DAW, sound module, or app like Numa Piano or MainStage.
Powering up
Follow these rules for a consistent power-up every time.
- Connect your controllers to the powered hub
Your MIDI controllers (2–7 of them) hook into the powered USB hub. If you only use one controller, you won't need a hub at all.
- Power the hub
The hub needs its own USB-C power feed. The PianoHack acts as just another MIDI controller connected to a port on the hub.
- Connect the hub to the merge unit
The hub — with every controller and the PianoHack attached — plugs into the CME H4/H2 MIDI router/merge unit. Then go out to your DAW or sound module.
MIDI channels used
The PianoHack outputs on several channels so you can assign a different sound to each — in your DAW, sound module, or synth.
| Channel in | Channel out | What it carries | Sound suggestion |
|---|---|---|---|
| 7 | 7 | Main channel — remapped notes into your sound module or DAW | Piano, electric piano |
| 7 | 6 | Second layer — add any sound you want on top | Strings, e-piano |
| 7 | 5 | 1-Button Chord play | Strings, e-piano |
| 7 | 8 | Bass — lower bass notes for chord roots and inversions | Bass, bass piano |
| 9 | 9 | 1-Button Riff | Piano, synth, lead |
| 7 | 11 | Scale mode — a separate sound for soloing in the 4 scales | Synth, leads |
Boot LED guide
The LED on the PianoHack unit tells you whether your custom riffs are loaded at boot. The good news: you don't have to take your micro-SD card to the gig — load your riffs at home.
| LED on boot | What it means | Riff source |
|---|---|---|
| Green (1 sec) | Success! New custom riffs were just loaded from the SD card and saved to memory. | SD card |
| Blue (1 sec) | Gig ready. The device found your previously saved custom riffs in memory. | Internal memory |
| Red, then blue | Gig ready (no SD). No SD card found, but your custom riffs are safely loaded from memory. | Internal memory |
| Red, then yellow | First run / no data. No SD card and no previous saves — the PianoHack loads the default riffs it came with. | Factory defaults |